前面介绍了通过SpringAI来实现MCP Server,接下来我们再看一下,通过SpringAI来实现一个支持上次实现的MCP Client的AI对话
一、项目初始化
SpringAI MCP客户端的starter,提供了MCP客户端的自动配置,支持多种传输方式(本地+网络),支持同步、异步的调用
1. 项目创建
创建一个SpringBoot项目,并引入SpringAI依赖,基本流程如 创建一个SpringAI-Demo工程
1
2
3
4
5
6
7
8
9
10
11
12
13
14
15
16
17
18
19
20
21
22
23
| <dependencies>
<dependency>
<groupId>org.springframework.boot</groupId>
<artifactId>spring-boot-starter-web</artifactId>
</dependency>
<dependency>
<groupId>org.springframework.ai</groupId>
<artifactId>spring-ai-starter-model-zhipuai</artifactId>
</dependency>
<dependency>
<groupId>org.springframework.ai</groupId>
<artifactId>spring-ai-starter-mcp-client</artifactId>
</dependency>
<dependency>
<groupId>org.springframework.boot</groupId>
<artifactId>spring-boot-starter-thymeleaf</artifactId>
</dependency>
<dependency>
<groupId>io.github.wimdeblauwe</groupId>
<artifactId>htmx-spring-boot-thymeleaf</artifactId>
<version>3.4.0</version>
</dependency>
</dependencies>
|
其中spring-ai-starter-mcp-client依赖,提供了MCP客户端的starter,使用的是智谱的免费大模型GLM-4-Flash
其次我们使用 thymeleaf + htmx 来实现一个简单的聊天界面
2. 项目配置
在配置文件中,除了指定大模型的密钥、模型之外,还需要配置MCP客户端的参数
1
2
3
4
5
6
7
8
9
10
11
12
13
14
15
16
17
18
19
20
21
22
23
24
25
26
27
28
| spring:
ai:
zhipuai:
api-key: ${zhipuai-api-key}
chat:
options:
model: GLM-4-Flash
mcp:
client:
sse:
connections:
global-date-times:
url: http://localhost:8080/sse
enabled: true
name: time-mcp
version: 1.0.0
request-timeout: 30s
type: async
logging:
level:
org.springframework.ai.chat.client.advisor.SimpleLoggerAdvisor: debug
server:
port: 8081
|
我们这里的使用的MCP Server为S07-mcp-server中实现的根据地区获取当前时间的服务
二、MCP Client实现
SpringAI 对MCP Client 的实现封装的非常好了,对于上层应用而言,直接可以通过自定注入的 ToolCallbackProvider,将mcp client作为大模型的工具调用添加到模型中,然后通过模型调用,即可完成MCP的使用演示
1. 初始化ChatClient
直接通过模型和ToolCallbackProvider,来创建支持mcp调用的 ChatClient
1
2
3
4
5
6
7
8
9
10
11
12
13
14
| @Controller
public class ChatController {
private final ChatClient chatClient;
public ChatController(ChatModel chatModel, ToolCallbackProvider toolCallbackProvider) {
System.out.println("当前注册的工具数量: " + toolCallbackProvider.getToolCallbacks().length);
this.chatClient = ChatClient.builder(chatModel)
.defaultToolCallbacks(toolCallbackProvider)
.defaultAdvisors(MessageChatMemoryAdvisor.builder(MessageWindowChatMemory.builder().build()).build(),
new SimpleLoggerAdvisor())
.build();
}
}
|
2. 实现聊天对话
聊天对话的实现,非常简单,通过 ChatClient 调用模型,并返回结果
1
2
3
4
5
6
7
8
9
10
11
12
13
14
15
16
17
18
19
20
21
22
23
24
25
26
27
28
29
30
| @Controller
public class ChatController {
@GetMapping("/")
public String index(Model model) {
return "index";
}
@PostMapping("/ask")
public HtmxResponse chat(String message, Model model) {
String res = this.chatClient.prompt(message).call().content();
model.addAttribute("question", message);
model.addAttribute("response", res);
return HtmxResponse.builder().view("chat :: chatFragment").build();
}
}
|
3. 前端聊天页面实现
聊天主页 index.html
1
2
3
4
5
6
7
8
9
10
11
12
13
14
15
16
17
18
19
20
21
22
23
24
25
26
27
28
29
30
31
32
33
34
35
36
37
38
39
40
41
42
43
44
45
46
47
48
49
50
51
52
53
54
55
56
57
58
59
60
61
62
63
64
65
66
67
68
69
70
71
72
73
74
75
76
77
78
79
80
81
82
83
84
85
86
87
88
|
<!DOCTYPE html>
<html xmlns:th="http://www.thymeleaf.org">
<head>
<title>支持MCP Client的聊天对话框</title>
<script src="https://unpkg.com/htmx.org@1.9.12"
integrity="sha384-ujb1lZYygJmzgSwoxRggbCHcjc0rB2XoQrxeTUQyRjrOnlCoYta87iKBWq3EsdM2"
crossorigin="anonymous"></script>
<script src="https://cdn.tailwindcss.com"></script>
<script>
function scrollToBottom(element) {
document.getElementById('message').value = ''
element.scrollTop = element.scrollHeight;
}
</script>
</head>
<body class="h-screen bg-gradient-to-br from-indigo-50 to-purple-50">
<div class="flex h-full max-w-6xl mx-auto">
<main class="flex flex-col p-4 w-full">
<header class="mb-6 py-4 border-b border-gray-200">
<h1 class="text-3xl font-bold leading-none tracking-tight text-indigo-800">
🤖 MCP Client Chat
</h1>
<p class="text-gray-600 mt-1">与AI助手进行智能对话</p>
</header>
<div id="chat" class="flex-1 mb-4 p-4 rounded-2xl bg-white shadow-sm overflow-auto">
</div>
<div class="bg-white rounded-2xl shadow-lg p-4">
<form
class="w-full"
hx-post="/ask"
hx-swap="beforeend"
hx-target="#chat"
hx-indicator="#loading-indicator"
hx-on="htmx:beforeRequest:
document.getElementById('message').disabled = true;
document.getElementById('submit-btn').disabled = true;
document.getElementById('submit-btn').classList.add('opacity-50', 'cursor-not-allowed');
htmx:afterRequest:
document.getElementById('message').value = '';
document.getElementById('message').disabled = false;
document.getElementById('submit-btn').disabled = false;
document.getElementById('submit-btn').classList.remove('opacity-50', 'cursor-not-allowed');
scrollToBottom(document.getElementById('chat'));">
<div class="flex items-center rounded-full bg-gray-100 p-2 shadow-inner">
<input type="text" name="message" id="message"
class="bg-transparent outline-none text-gray-700 rounded-full py-3 px-4 w-full"
placeholder="输入消息..."/>
<button type="submit" class="bg-indigo-600 hover:bg-indigo-700 text-white font-bold rounded-full p-3 ml-2 transition duration-200 relative">📤
<span id="loading-indicator" class="htmx-indicator absolute inset-0 flex items-center justify-center"><span class="animate-spin rounded-full h-6 w-6 border-b-2 border-white"></span></span>
</button>
</div>
</form>
</div>
</main>
</div>
<style>
@keyframes spin {
0% {
transform: rotate(0deg);
}
100% {
transform: rotate(360deg);
}
}
.animate-spin {
animation: spin 1s linear infinite;
}
.htmx-indicator {
display: none;
}
.htmx-request .htmx-indicator {
display: flex;
}
.htmx-request.htmx-indicator {
display: flex;
}
</style>
</body>
</html>
|
对话历史 chat.html
1
2
3
4
5
6
7
8
9
| <!DOCTYPE html>
<html xmlns:th="http://www.thymeleaf.org">
<body>
<div th:fragment="chatFragment" class="mb-8">
<div class="inline-block bg-blue-300 rounded-lg p-2 ml-auto" th:text="${question}">Message</div>
<p class="mt-4 h-full overflow-auto" th:text="${response}">Response</p>
</div>
</body>
</html>
|
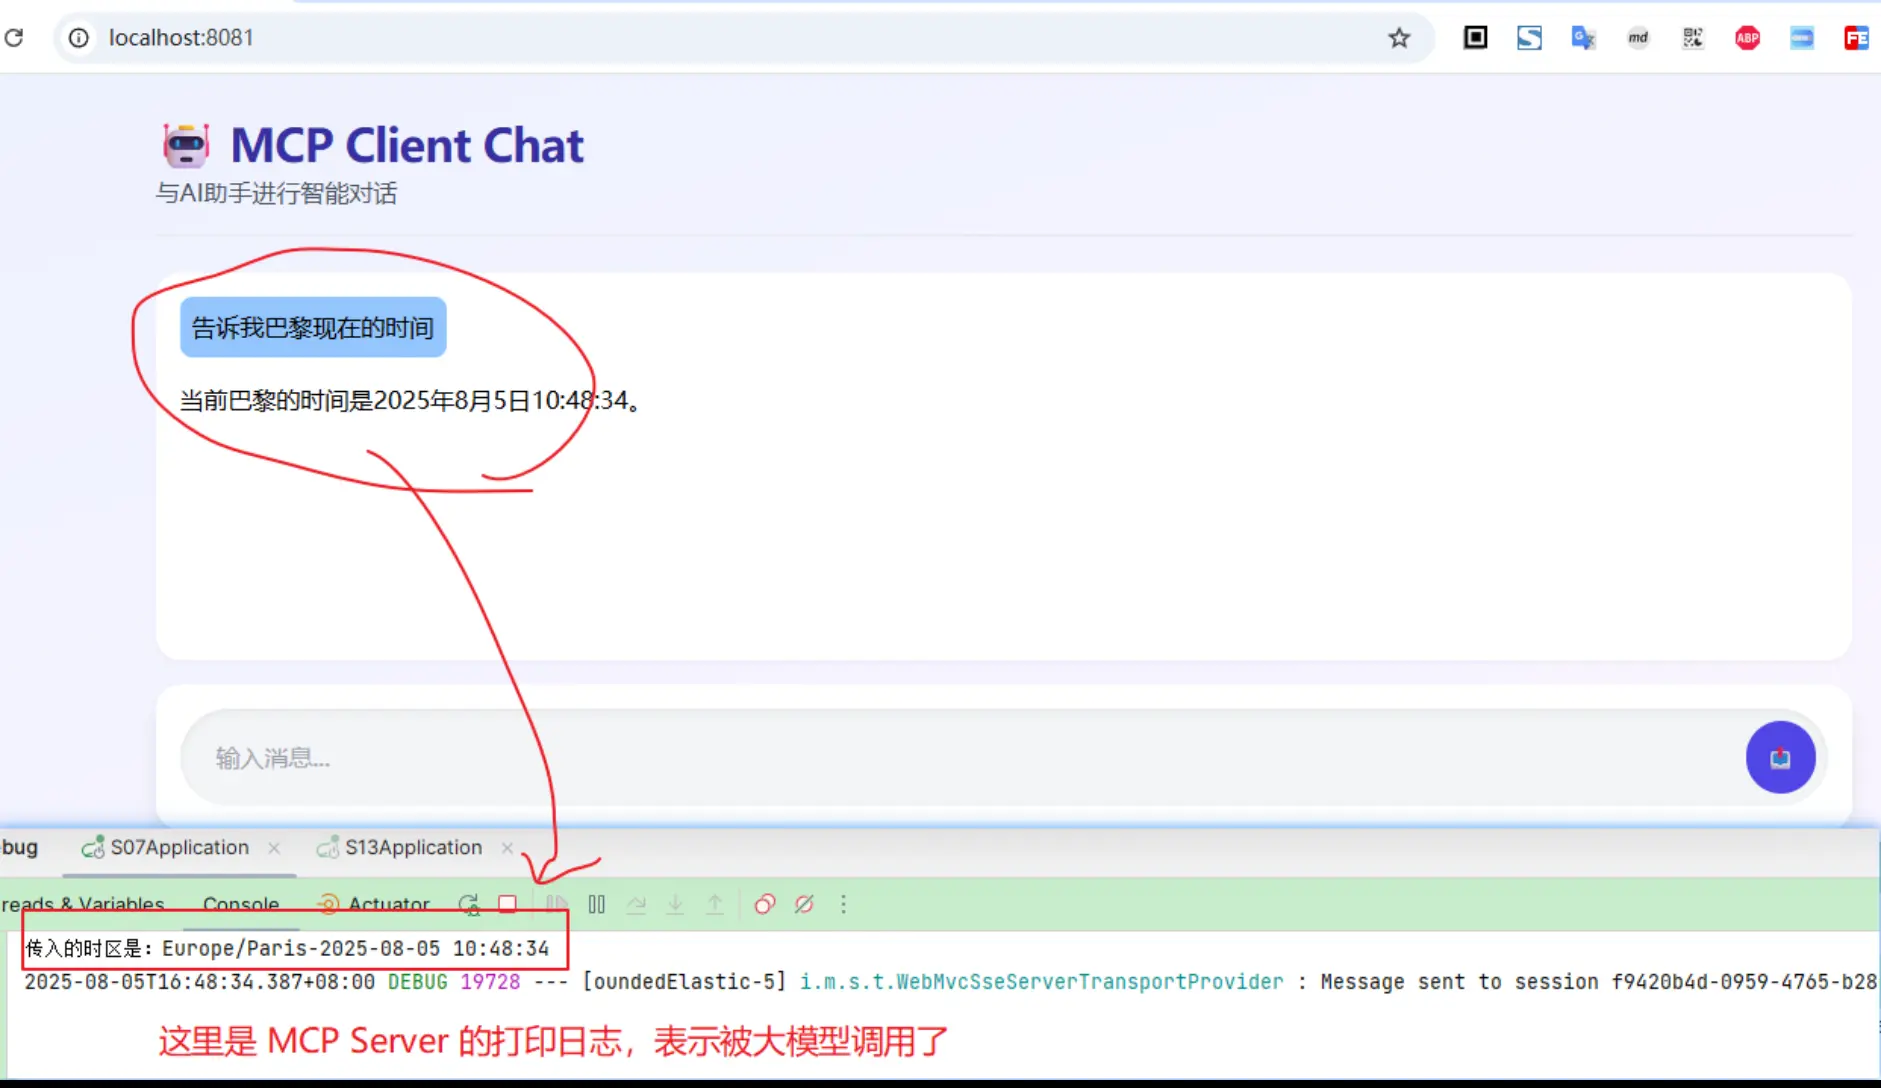
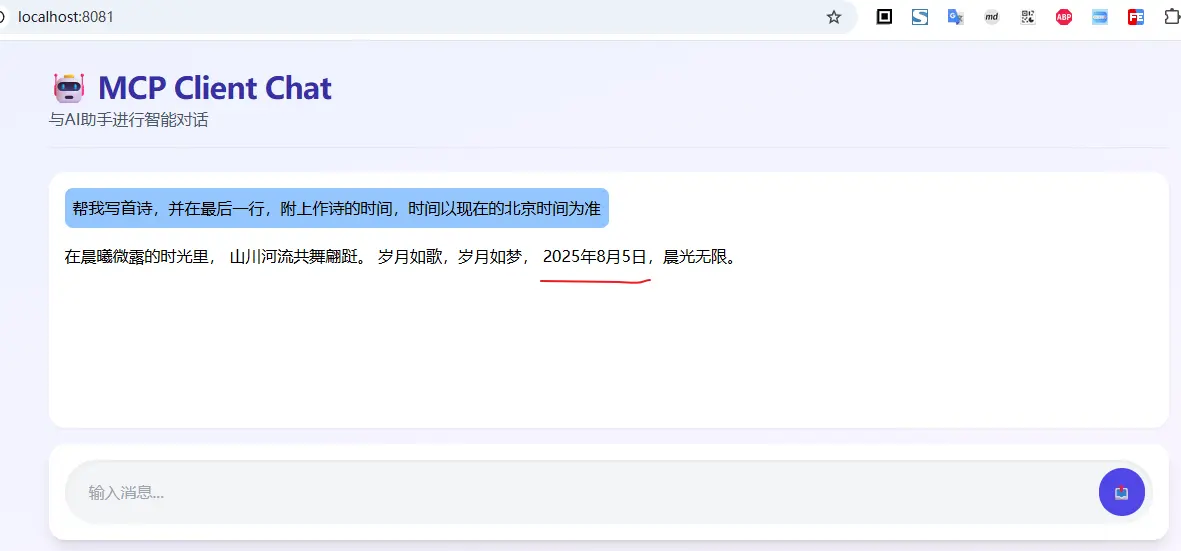
4. 使用测试
首先,启动mcp server, 然后再启动聊天对话框;然后开始对话
三、小结
本文主要介绍将MCP Client的使用,整体应用起来,比较简单,甚至是比function calling更简单(因为自动将mcp服务注入为ToolCallbackProvider,可以直接传入ChatClient用作大模型的工具调用)
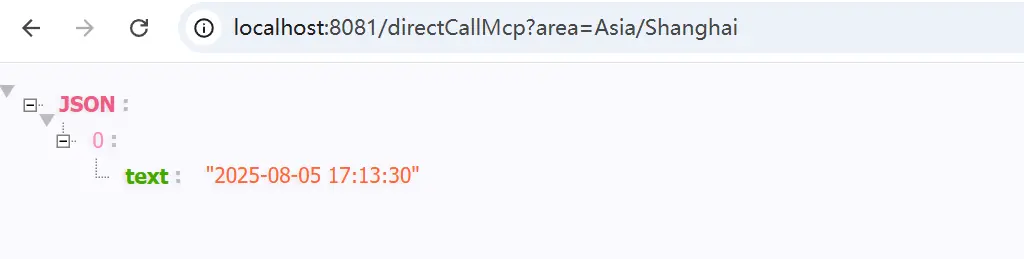
当然除了上面这种方式之外,我们也可以直接使用MCP Client来进行交互
MCPClient 使用姿势参考官方文档: java-mcp-client
1
2
3
4
5
6
7
8
9
10
11
12
13
14
15
16
17
18
19
20
21
22
23
24
|
@Autowired
private List<McpSyncClient> mcpSyncClients;
@Autowired
private List<McpAsyncClient> mcpAsyncClients;
@GetMapping("/directCallMcp")
@ResponseBody
public Object directCallMcp(String area) {
Mono<McpSchema.CallToolResult> result = mcpClients.get(0).callTool(
new McpSchema.CallToolRequest("getTimeByZoneId", Map.of("area", area))
);
return result.block().content();
}
|
文中所有涉及到的代码,可以到项目中获取 https://github.com/liuyueyi/spring-ai-demo
微信公众号: 一灰灰Blog
尽信书则不如,以上内容,纯属一家之言,因个人能力有限,难免有疏漏和错误之处,如发现bug或者有更好的建议,欢迎批评指正,不吝感激
下面一灰灰的个人博客,记录所有学习和工作中的博文,欢迎大家前去逛逛

打赏
如果觉得我的文章对您有帮助,请随意打赏。
微信打赏

支付宝打赏