前面几篇关于Bean的基础博文中,主要集中在Bean的定义和使用,但实际的情况中有没有一些场景是不加载我定义的bean,或者只有满足某些前提条件的时候才加载我定义的Bean呢?
本篇博文将主要介绍bean的加载中,条件注解@Conditional的相关使用
I. @Conditional注解
这个注解在Spring4中引入,其主要作用就是判断条件是否满足,从而决定是否初始化并向容器注册Bean
1. 定义
@Conditional注解定义如下,其内部主要就是利用了Condition接口,来判断是否满足条件,从而决定是否需要加载Bean
1 |
|
下面是Condtion接口的定义,这个可以说是最基础的入口了,其他的所有条件注解,归根结底,都是通过实现这个接口进行扩展的
1 |
|
这个接口中,有个参数比较有意思ConditionContext,它持有不少有用的对象,可以用来获取很多系统相关的信息,来丰富条件判断,接口定义如下
1 | public interface ConditionContext { |
2. 使用说明
通过一个小例子,简单的说一下如何使用Condition和@Conditional注解,来实现bean的条件加载
首先我们定义一个随机产生数据的类,其功能就是随机生成一些数据
1 | public class RandDataComponent<T> { |
我们目前提供两种随机数据生成的bean,但是需要根据配置来选择具体选中的方式,因此我们如下定义Bean
1 |
|
上面的配置,先不管@Conditional注解的内容,单看两个Bean的定义,一个是定义int随机数生成;一个是定义boolean随机生成;
但是我们的系统中,只需要一个随机数据生成器即可,我们选择根据配置conditional.rand.type的值来选择到底用哪个,配置如下
1 | # int 表示选择随机产生int数据; 非int 表示随机产生boolean数据 |
接下来就得看这个条件如何加上了,也就是上面配置类ConditionalAutoConfig中两个注解的内容了,两个类都是实现Condition的接口,具体如下
1 | public class RandBooleanCondition implements Condition { |
上面的实现也比较清晰,获取配置值,然后判断,并返回true/fase;返回true,则表示这个条件满足,那么这个Bean就可以被加载了;否则这个Bean就不会创建
3. 测试与验证
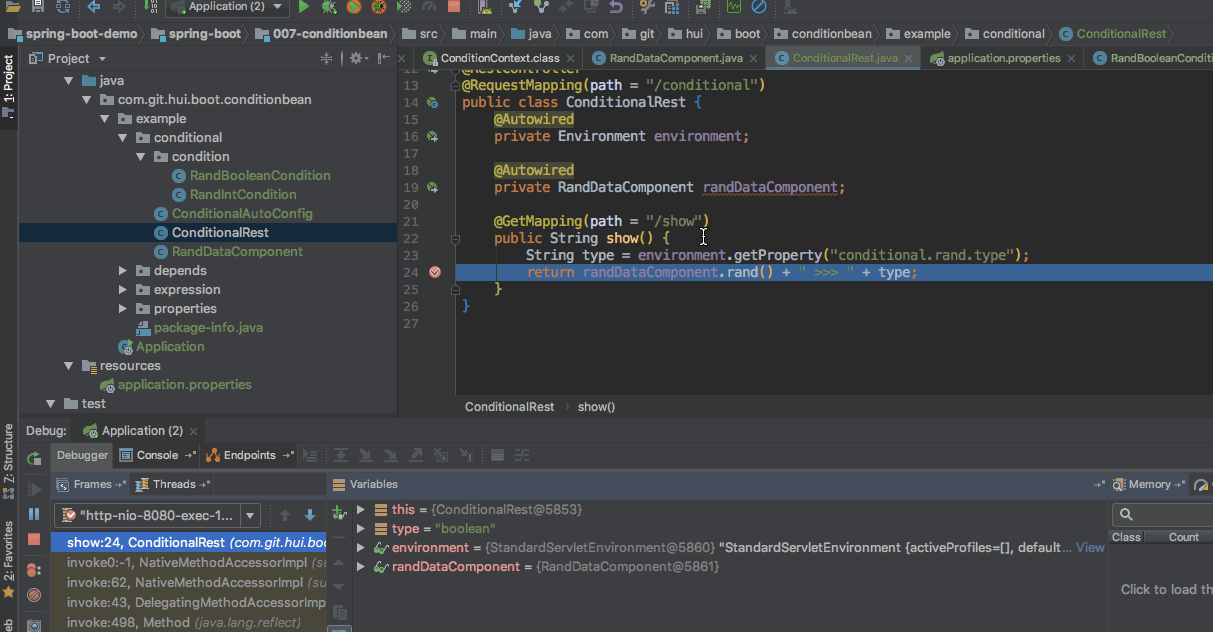
针对上面的配置与实现,写一个测试类如下
1 |
|
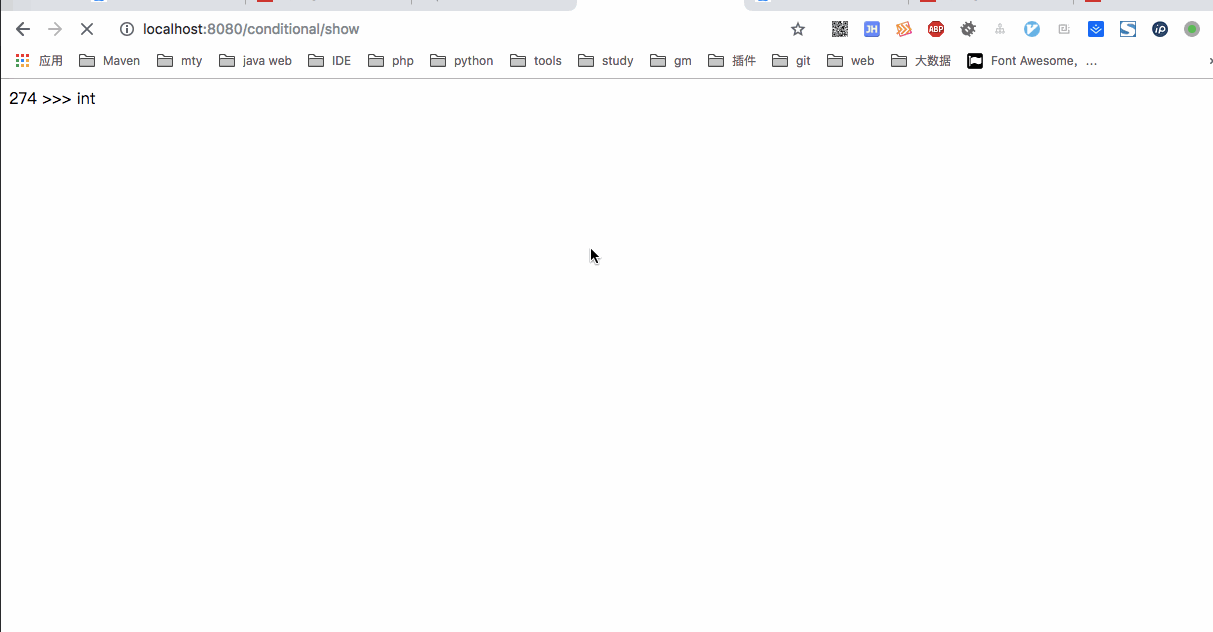
当配置文件的值为int时,每次访问返回的应该都是正整数,演示如下图
将配置的值改成boolean之后,再次测试如下图
II. 扩展与小结
上面的测试演示了通过配置文件选择注入Bean的情况,如果一个Bean是通过自动扫描加载的,是否可以直接在Bean的类上添加注解来决定是否载入呢?
1. 自动扫描Bean的条件加载
从使用来讲,和前面的没有什么区别,只是将注解放在具体的类上而言,同样给出一个示例,先定义一个bean
1 |
|
对应的判断条件如下,当配置文件中conditional.demo.load为true时,才会加载这个配置,否则不实例化
1 | public class ScanDemoCondition implements Condition { |
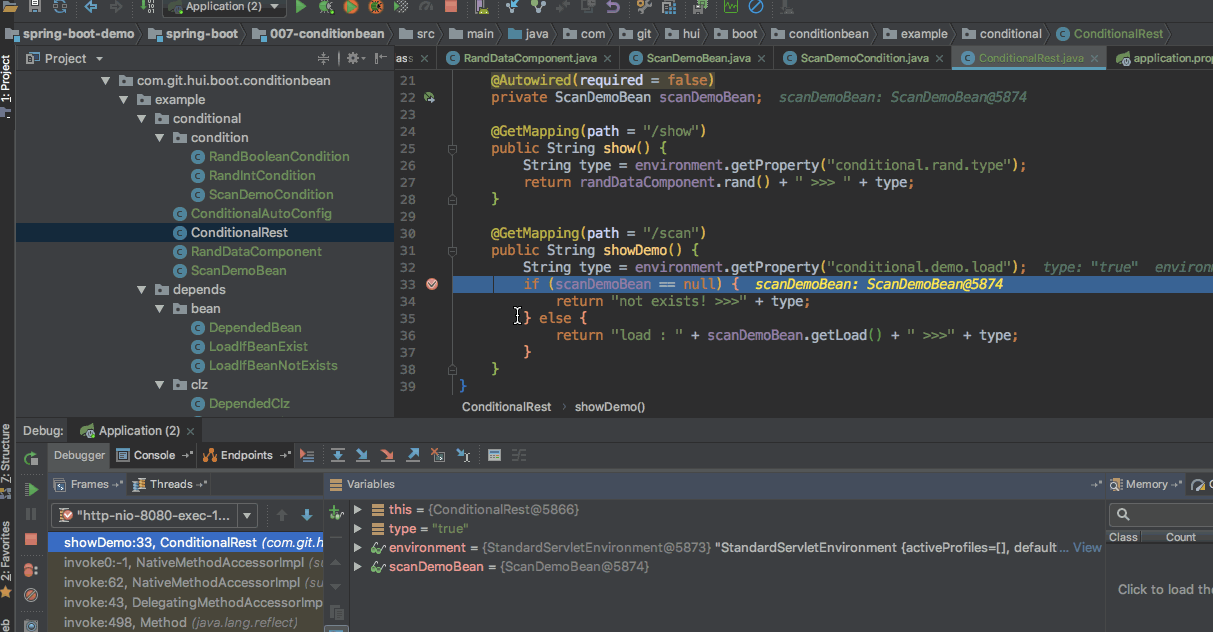
测试类和前面差不多,稍微注意下的就是自动注入时,改一下必要条件,避免bean不存在时报错
1 |
|
当配置为true时,bean应该存在,走上面的else逻辑
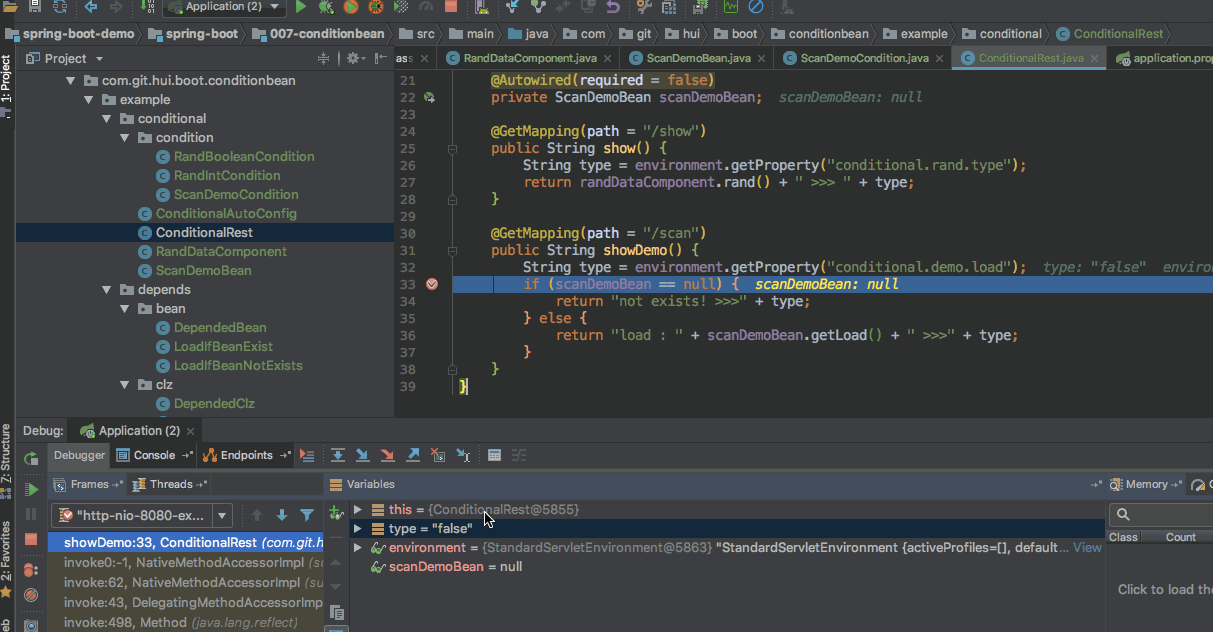
当配置为false时,不会加载bean,走if逻辑
2. 小结
通过@Conditional注解配合Condition接口,来决定给一个bean是否创建和注册到Spring容器中,从而实现有选择的加载bean
a. 优势
这样做的目的是什么呢?
- 当有多个同名bean时,怎么抉择的问题
- 解决某些bean的创建有其他依赖条件的case
b. 更多注解
上面可以控制bean的创建,但通过上面的流程,会发现有一点繁琐,有没有什么方式可以简化上面的流程呢?
只用一个注解就好,不要自己再来实现Condtion接口,Spring框架提供了一系列相关的注解,如下表
| 注解 | 说明 |
|---|---|
@ConditionalOnSingleCandidate |
当给定类型的bean存在并且指定为Primary的给定类型存在时,返回true |
@ConditionalOnMissingBean |
当给定的类型、类名、注解、昵称在beanFactory中不存在时返回true.各类型间是or的关系 |
@ConditionalOnBean |
与上面相反,要求bean存在 |
@ConditionalOnMissingClass |
当给定的类名在类路径上不存在时返回true,各类型间是and的关系 |
@ConditionalOnClass |
与上面相反,要求类存在 |
@ConditionalOnCloudPlatform |
当所配置的CloudPlatform为激活时返回true |
@ConditionalOnExpression |
spel表达式执行为true |
@ConditionalOnJava |
运行时的java版本号是否包含给定的版本号.如果包含,返回匹配,否则,返回不匹配 |
@ConditionalOnProperty |
要求配置属性匹配条件 |
@ConditionalOnJndi |
给定的jndi的Location 必须存在一个.否则,返回不匹配 |
@ConditionalOnNotWebApplication |
web环境不存在时 |
@ConditionalOnWebApplication |
web环境存在时 |
@ConditionalOnResource |
要求制定的资源存在 |
III. 其他
0. 相关
a. 更多博文
基础篇
- 181009-SpringBoot基础篇Bean之基本定义与使用
- 181012-SpringBoot基础篇Bean之自动加载
- 181013-SpringBoot基础篇Bean之动态注册
- 181018-SpringBoot基础篇Bean之条件注入@Condition使用姿势
- 181019-SpringBoot基础篇Bean之@ConditionalOnBean与@ConditionalOnClass
- 181019-SpringBoot基础篇Bean之条件注入@ConditionalOnProperty
- 181019-SpringBoot基础篇Bean之条件注入@ConditionalOnExpression
应用篇
b. 项目源码
- 工程:spring-boot-demo
- module: 007-conditionbean
1. 一灰灰Blog
- 一灰灰Blog个人博客 https://blog.hhui.top
- 一灰灰Blog-Spring专题博客 http://spring.hhui.top
一灰灰的个人博客,记录所有学习和工作中的博文,欢迎大家前去逛逛
2. 声明
尽信书则不如,以上内容,纯属一家之言,因个人能力有限,难免有疏漏和错误之处,如发现bug或者有更好的建议,欢迎批评指正,不吝感激
- 微博地址: 小灰灰Blog
- QQ: 一灰灰/3302797840
3. 扫描关注
一灰灰blog

知识星球